

Introduce
Foam cannons are key point for washing cars. They help loosen and break down dirt, grime and other types of contamination with layers of thick soap foam.
They speed up the washing process and provide extra lubrication between your wash mitt and the paint to prevent scratches. That’s why professional detailers love them.
But there are some drawback in that they can be a tick confusing to use. They require a pressure washer, which not everyone has. What’s more, green hands think it’s hard to adjust the nozzle properly and don’t know how to choose a suitable foam cannon.
In this article, I’ll try my best to explain how foam cannons work, why they’re different from foam guns, how to choose a suitable foam cannon for you, adjust the nozzle properly and dial-in your soap-to-water ratio.

How Do Foam Cannons Generate Thick Foam?
Water and car soap are combined in the foam cannon bottle. When you pull the trigger, high-pressure water from the pressure washer draws the soap mixture into the cannon’s mixing chamber. Air is added inside the chamber, whipping the soap and water into thick, rich foam that sticks to the surface.
That’s how a foam cannon turns simple soap and water into a powerful, creamy layer of cleaning foam.

What’s The Difference Between Foam Cannons And Foam Guns?
Foam cannon is a device that connects to a pressure washer to spray thick, clingy foam for cleaning cars, bikes, or surfaces. It mixes water, air, and soap under high pressure to create rich foam that helps lift dirt safely. It is ideal for pros, car detailers, heavy users, or anyone who wants thick foam and deep cleaning results.
Foam gun connects to a garden hose and works at low pressure, producing lighter foam. It’s convenient for quick washes at home without extra equipment. It is better for casual users, light cleaning or beginners who only have a garden hose.
How to Choose the Right Foam Cannon for Your Pressure Washer?
When choosing a foam cannon, our goal is to get thick, shaving-cream-like foam and long-lasting performance. Here’s what to look for:
1. PSI & GPM Compatibility
Make sure your foam cannon matches your pressure washer’s power. Most foam cannons work best with 1,000–3,000 PSI and 1.4–2.5 GPM. If the pressure is too low, the foam will be watery; too high, and it may damage the nozzle.
2. Connector Type
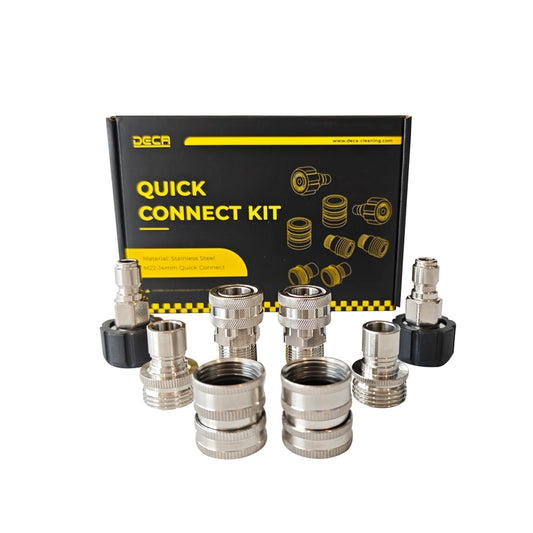
Check the connection style: Quick Connect or M22 fitting. Quick connect is faster for switching accessories, while M22 provides a tighter seal for heavy-duty use.
3. Material Quality
Stainless steel and brass cannons are durable, corrosion-resistant, and maintain pressure better.
Plastic versions are lighter and cheaper but wear out faster. For frequent use, choosing a brass or stainless steel body is better.
4. Adjustability
A good foam cannon lets you adjust both foam density and spray angle. More control = easier to create thick, clingy foam that looks like shaving cream.
5. Easy-Clean Design
Look for a replaceable mesh filter inside the nozzle—it prevents clogging and makes maintenance simple. A removable top and wide bottle opening also make refilling and cleaning easier.
6. Bottle Capacity
1L bottles are ideal for washing cars, trucks, or large surfaces. While 0.8L bottles are lighter and easier to handle for quick home washes.
If you use your foam cannon regularly, invest in a heavy-duty brass model with an adjustable knob and 1L bottle — it’ll give you thick foam, better control, and longer life.

Maintenance Wash vs. Prep Wash
Routine Maintenance Wash (No Wash Mitt Needed)
Quickly remove light dust, pollen, or road film without touching the paint.
Step-by-Step:
1. Rinse the car with plain water to remove loose dirt.
2. Fill the foam cannon bottle with water and add about 1–2 oz of car shampoo (use pH-neutral soap).
3. Adjust the foam knob for medium thickness.
4. Spray foam evenly from bottom to top — this gives more dwell time on lower panels.
5. Let the foam dwell for 3–5 minutes, allowing it to lift dirt safely.
6. Rinse thoroughly with clean water.
7. Dry with a microfiber towel or air dryer — done!
It’s Perfect for weekly washes or maintenance between deep cleanings.
Pre-Wash (Deep Cleaning with Wash Mitt)
Remove heavy dirt, road grime, and stubborn contaminants safely before hand washing.
Step-by-Step:
1. Rinse the vehicle to knock off large dirt particles.
2. Fill the foam cannon with concentrated shampoo (mix stronger, e.g., 1:10 ratio).
3. Adjust for thick foam—aim for a “shaving cream” texture.
4. Spray foam generously from top to bottom, covering all areas.
5. Let foam dwell for 5–7 minutes, but don’t let it dry.
6. Use a wash mitt to gently agitate panels from top to bottom.
7. Rinse off completely with high-pressure water.
8. Dry using a clean microfiber towel or blower.
For best results, follow up with a clay bar or wax protection after the pre-wash.
⚠ IMPORTANT: Mix Soap and Water Before Use!
When adding car wash soap to the reservoir, the soap will tend to sink to the bottom and settle as seen above. Be sure to stir the water and soap to create a uniform solution before you start washing. Otherwise, the soap at the bottom of the reservoir won’t get sucked up by the siphon tube because it is too thick.
What’s The Common Mistakes When Using a Foam Cannon?
Even though a foam cannon is easy to use, many people make small mistakes that lead to weak foam or poor cleaning results. Here are the most common ones to avoid:
1. Using the Wrong Soap
Regular car shampoo or household detergent doesn’t foam well. We’d better choose soap made for foam cannons—they are high-foaming and pressure washer-safe.
2. Incorrect Soap-to-Water Ratio
Too much water = watery foam; too much soap = waste and clogs.
A good starting ratio is 1:10 (soap:water), then adjust based on foam thickness.
3. Low Pressure or Flow Rate
If your pressure washer has less than 1,000 PSI or 1.4 GPM, it won’t generate thick foam. Check your washer’s specs to ensure compatibility.
4. Spraying Under Direct Sunlight or on Hot Surfaces
Foam dries too fast, leaving soap spots or streaks. Always wash in the shade and on a cool surface.
5. Not Cleaning the Foam Cannon After Use
Leftover soap can harden and clog the nozzle or mesh filter. Rinse the bottle and flush with clean water after every wash.
6. Improper Adjustment
Many users forget to fine-tune the foam density knob and spray angle. Take a few seconds to adjust until the foam looks thick and even.
If your foam looks thin or uneven, check three things first—soap concentration, pressure washer PSI, and clean filter. Fixing these usually solves 90% of foam cannon issues.
How to Maintain and Clean a Foam Cannon?
A clean foam cannon = thicker foam + longer life. Regular rinsing and filter checks can prevent 90% of clogging and pressure issues.
After Every Use (Routine Maintenance)
1. Empty the Bottle
Pour out any leftover soap solution after washing. Leaving soap inside can cause residue buildup.
2. Rinse with Clean Water
Fill the bottle with plain water, connect it to the pressure washer, and spray for 20–30 seconds to flush the internal parts.
3. Wipe and Dry
Use a clean towel to wipe the bottle and metal fittings. Store in a dry, cool place away from direct sunlight.
Deep Cleaning (Every 1–2 Months)
1. Disassemble the Nozzle and Filter
Remove the nozzle tip and take out the mesh filter inside. This part often traps soap or minerals.
2. Soak in Warm Water + Vinegar
Mix warm water with a small amount of vinegar and soak the parts for 10–15 minutes to dissolve any soap scum or hard water deposits.
3. Brush and Rinse
Use a soft brush or toothbrush to remove buildup. Rinse all components thoroughly with clean water.
4. Check and Lubricate O-Rings
Inspect O-rings for cracks or wear. Apply a light coat of silicone grease to keep them flexible and prevent leaks.
5. Reassemble and Test
Put all parts back together and spray a little water to ensure smooth flow.
Storage Tips
It’s better to store your foam cannon upright to prevent leaks. In cold weather, drain all water to avoid internal freezing and cracking.
Foam Cannon Troubleshooting Guide
If your foam cannon isn’t working properly — producing thin foam, leaking, or not spraying evenly—don’t worry. Most issues are easy to fix. Here’s a quick guide to help you troubleshoot:
Problem Possible Cause Solution
|
Problem |
Possible Cause |
Solution |
|
Foam is too watery or thin |
Soap-to-water ratio too weak; pressure too low |
Use a thicker mix (1:5–1:10 ratio); check PSI (at least 1000 PSI and 1.4 GPM) |
|
No foam coming out |
Nozzle or mesh filter is clogged |
Remove and clean the nozzle and filter with warm water + vinegar |
|
Foam cannon leaking |
Loose fittings or damaged O-ring |
Tighten connections; replace worn O-rings |
|
Uneven spray pattern |
Nozzle tip partially blocked or misaligned |
Rinse the tip; realign or replace if worn |
|
Soap not being drawn up |
Suction tube disconnected or blocked |
Reconnect or clean the suction tube; ensure it reaches the bottom of the bottle |
|
Weak foam despite correct mix |
Hard water or low-quality soap |
Use filtered or softened water; switch to a high-foaming shampoo |
|
Air bubbles or sputtering |
Air leak in fittings |
Check all seals and tighten; apply thread tape if needed |
The "foam monitor" isn't a "stupid tax" – it's a game-changing car wash tool that helps you save time and protect your car’s paint. Master these few tips, and you’ll achieve salon-quality results at home!
Upgrade your cleaning setup with a DECA Foam Cannon today!


