
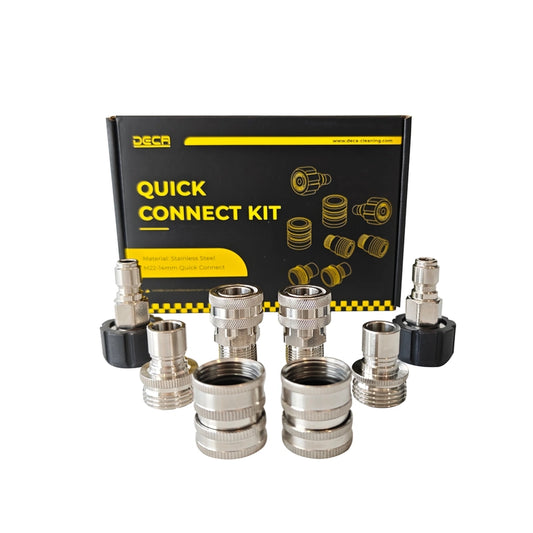

A small leak at a hose, spray gun, wand, or quick-connect fitting can waste water, reduce cleaning performance, and make accessories difficult to use.
The fitting itself is not always the problem. Many connection leaks are caused by a small internal seal called an O-ring. If the O-ring is cut, flattened, twisted, missing, or the wrong size, water can pass around the connection even when the parts appear to be securely attached.
Replacing an O-ring is usually simple, but the system must be completely depressurized before any connection is opened.
What Does an O-Ring Do?
An O-ring is a flexible circular seal installed inside a fitting or around a connector. When two compatible fittings are joined, the O-ring is compressed between their sealing surfaces.
This compression creates a barrier that prevents water from escaping.
Pressure-washing O-rings are commonly found in:
- Quick-connect sockets
- M22 hose fittings
- Spray-gun inlets
- Wand connections
- Nozzle holders
- Foam-cannon connectors
- Hose adapters
The exact size and material vary by fitting. Two O-rings that look similar may not seal the same connection.
Signs That an O-Ring May Be Damaged
Common symptoms include:
- Water leaking around a connected coupler
- A quick-connect plug that feels unusually loose
- Leakage that begins immediately after changing an accessory
- An O-ring protruding from the fitting
- A connector that is difficult to insert
- A leak that remains after the fitting has been tightened correctly
An O-ring can also become hard, brittle, swollen, or permanently flattened over time.
If water appears from a crack in the fitting body, a damaged hose crimp, or inside the spray-gun handle, replacing the visible connection O-ring may not solve the problem.

Locate the Source of the Leak
Dry the fittings before testing. This makes it easier to see where the first drop of water appears.
Observe whether the leak comes from:
- The joint between two connected fittings
- The threaded section behind an adapter
- The hose crimp
- The body of the coupler
- The spray-gun handle or trigger area
A leak from the connection face often indicates an O-ring problem. A leak from the threads may involve an incorrectly installed adapter, damaged threads, a missing thread seal, or incompatible fittings.
Do not continue tightening a fitting to stop a leak unless its instructions call for further tightening. Excessive force can damage threads, crush seals, or crack an adapter.
Depressurize Before Disconnecting Anything
Before inspecting a connection:
- Stop the water and power source according to the equipment instructions.
- Point the spray gun in a safe direction.
- Squeeze the trigger to release trapped pressure.
- Confirm that no pressure remains.
- Disconnect the accessory.
Never attempt to remove a hose, nozzle, adapter, or quick-connect fitting while the system is pressurized.
Remove the Old O-Ring
Use a non-sharp O-ring pick or another suitable tool that will not scratch the sealing groove.
Lift one edge of the O-ring and carefully remove it. Avoid digging a metal point into the fitting. Even a small scratch across the sealing surface can create a leak that remains after a new O-ring is installed.
Inspect the old seal for:
- Cuts or missing sections
- Flattened sides
- Twisting
- Stretching
- Swelling
- Hardness or cracking
- Abrasion around the outer surface
The damage pattern may reveal the cause. A sliced O-ring can indicate a sharp fitting edge, while an extruded or stretched seal may be the wrong size.
Clean and Inspect the Fitting
Wipe the groove and sealing surface with a clean, lint-free cloth. Remove sand, rust particles, dried detergent, and other residue.
Check the fitting for corrosion, cracks, burrs, deep scratches, deformation, or loose internal parts.
Quick-connect sockets should lock securely when the collar is released. If the locking balls are corroded, missing, or unable to move freely, replace the fitting instead of relying on a new O-ring.
Choose the Correct Replacement
Do not select an O-ring by color alone. Match the replacement to the fitting manufacturer’s specification whenever possible.
The important measurements are:
- Inside diameter
- Outside diameter
- Cross-section thickness
- Seal material
- Intended pressure and temperature range
An undersized O-ring may stretch and become too thin. An oversized seal may pinch, roll, or prevent the connector from fully seating.
Also confirm that the two fittings are genuinely compatible. For example, forcing components with different M22 internal dimensions together can damage the seal and cause repeated leakage.
Install the New O-Ring
Apply a very thin layer of O-ring lubricant if the fitting instructions allow it. A silicone-based lubricant made for compatible elastomer seals is commonly used, but always follow the accessory manufacturer’s guidance.
Avoid applying excessive lubricant because it can attract dirt. Do not automatically use petroleum grease, motor oil, or an unknown spray lubricant; some products can cause certain seal materials to swell or deteriorate.
Press the O-ring evenly into its groove. Make sure it lies flat without twisting.
Reconnect the fitting straight rather than at an angle. For a quick-connect socket, pull back the collar, insert the plug completely, and release the collar. Gently pull on the connection to confirm that it has locked.

Test the Repair
Restore the water supply and inspect the connection at low pressure first. If the fitting remains dry, test the system under normal operating conditions while keeping hands away from the connection.
If it still leaks:
- Depressurize the system again
- Confirm that the O-ring is seated correctly
- Check that the replacement is the correct size
- Inspect the mating surfaces
- Verify that the fittings are compatible
- Replace the complete fitting if it is worn or damaged
Never place a hand over a pressurized leak to locate it.
When the Entire Fitting Should Be Replaced
An O-ring cannot repair every connection problem. Replace the fitting when you find:
- Cracked metal or plastic
- Damaged or crossed threads
- A deeply scratched sealing surface
- Heavy corrosion
- Missing quick-connect locking balls
- A collar that does not return smoothly
- A bent plug
- A fitting that disconnects under light pulling
A damaged fitting may release unexpectedly under pressure, so temporary repairs are not worth the risk.

How to Prevent Future O-Ring Damage
Keep connectors capped or covered during storage. Dirt inside a quick-connect socket can cut the seal during the next connection.
Insert fittings straight, never at an angle. Release quick-connect collars fully instead of forcing the plug past the locking mechanism.
Rinse detergent residue from foam-cannon and soap connections after use. Before storage, inspect exposed seals and allow the accessories to dry.
Keeping several correctly sized replacement O-rings with your cleaning accessories can prevent a small damaged seal from interrupting an entire cleaning job.
Final Takeaway
When a pressure-washing connection leaks, inspect the O-ring before replacing multiple accessories. A correctly sized, properly seated seal can often restore a dry and secure connection.
However, repeated leakage usually indicates contamination, fitting damage, incompatible connection sizes, or an incorrect replacement seal. Solve the underlying problem instead of repeatedly tightening the fitting.


