

A small drip at a pressure washer quick connect can quickly become a distracting spray, a wet work area, or a noticeable loss of performance. In many cases, the cause is a worn, cut, flattened, or displaced O-ring inside the female coupler. Replacing that seal can be a simple repair—but only after you confirm where the water is actually escaping.
This guide explains how to diagnose a leaking pressure washer connection, replace the quick-connect O-ring, and test the repair without damaging the fitting. It applies to common pressure washer accessory connections, but the fitting manufacturer’s instructions always take priority.
Safety First: Release All Pressure
Never inspect, disconnect, or repair a fitting while the system is pressurized. A high-pressure leak can injure skin even when the opening looks small.
Before touching the connection:
- Turn off the pressure washer and follow its shutdown instructions.
- Disconnect the power source or shut off the engine as directed by the manufacturer.
- Turn off the water supply.
- Point the spray gun in a safe direction and squeeze the trigger until pressure is fully released.
- Allow hot fittings and water to cool before handling them.
- Wear eye protection while inspecting and testing the connection.
Do not use your hand to search for a leak. Dry the area first, then observe it from a safe distance during the later test.
Find the Exact Source of the Leak
An O-ring only seals a specific part of the connection. Replacing it will not repair damaged threads, a cracked coupler body, or a failing hose crimp.
| Where water appears | Likely causes | Best next step |
|---|---|---|
| Between the male plug and female coupler | Cut, flattened, missing, twisted, or wrong-size O-ring; incomplete connection; mismatched fittings | Inspect the internal O-ring and confirm the plug and coupler match |
| Around the threaded base of an adapter | Loose adapter, damaged threads, wrong thread type, or incorrect sealing method | Disconnect, identify the thread, and reinstall according to the fitting instructions |
| Through the coupler body or release sleeve | Cracked body, corrosion, worn locking parts, or internal valve damage | Replace the coupler rather than only the O-ring |
| At the hose crimp or end reinforcement | Damaged hose assembly or fitting-to-hose connection | Stop using the hose and replace it; do not patch a high-pressure hose |
If the two halves will not seat securely, confirm their sizes before doing anything else. A 1/4-inch accessory quick connect, a 3/8-inch hose quick connect, and an M22 threaded connection are not interchangeable. DECA’s pressure washer compatibility guide explains the connector, pressure, flow, and thread details to check before combining parts.

What You Need
Gather the following before starting:
- A replacement O-ring specified for the exact coupler
- A plastic O-ring pick or another non-scratching removal tool
- A clean, lint-free cloth
- Clean water for rinsing the fitting
- Eye protection
- A very small amount of manufacturer-approved, O-ring-safe lubricant, if the fitting instructions permit it
Avoid choosing a replacement only because it “looks close.” The inside diameter, cross-section, material, temperature range, and chemical resistance all affect the seal. A loose O-ring may leak; an oversized one can twist, pinch, or prevent the plug from seating.
Do not apply petroleum grease unless the O-ring and fitting manufacturer specifically approves it. Some lubricants can swell or weaken seal materials.
How to Replace the Quick-Connect O-Ring
Step 1: Identify the Coupler and Seal
Disconnect the fitting only after the system is fully depressurized. Note where the coupler is installed and whether it is part of a 1/4-inch accessory connection or a larger hose-side connection.
Look inside the female coupler with good lighting. The O-ring normally sits in an internal groove and forms a seal around the male plug. If the seal is missing, torn, flattened, or partly pushed out of the groove, replacement is appropriate.
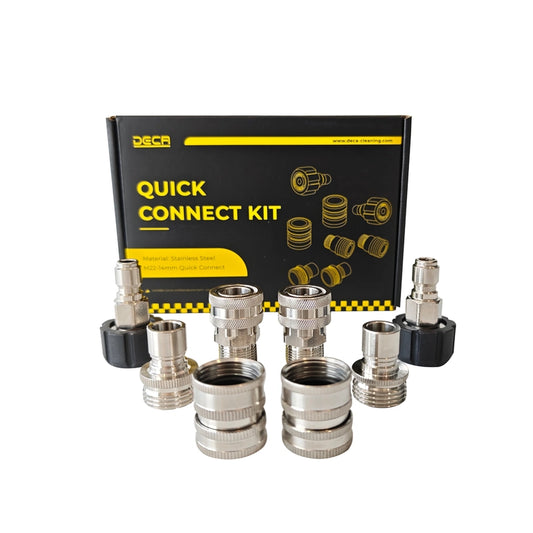
If you are also installing adapters, review How to Install a Pressure Washer Quick Connect Kit before reassembling the system. For compatible M22-14 mm setups, DECA’s 8-Piece Pressure Washer Quick Connect Kit includes M22, 3/8-inch, and garden-hose adapters; always confirm the connection sizes before ordering.
Step 2: Remove the Old O-Ring Carefully
Use a plastic pick to lift one edge of the old O-ring and pull it out of the groove. Work slowly. Scratching the sealing groove with a screwdriver or sharp metal hook can create a permanent leak path.
If the old seal has broken into pieces, remove every fragment. Do not place a new O-ring on top of the old one, and do not install two seals unless the fitting was specifically designed for that arrangement.
Step 3: Clean and Inspect the Groove
Wipe the inside of the coupler with a clean, lint-free cloth. Remove sand, dried detergent, rust particles, and pieces of the old seal. If necessary, rinse the disconnected fitting with clean water and dry it thoroughly.
Inspect the groove and the male plug for:
- Scratches or burrs
- Corrosion or pitting
- Cracks in the coupler
- A bent or deformed plug
- Damaged locking balls or a sleeve that does not move freely
A new O-ring cannot compensate for a deeply scratched sealing surface or a cracked fitting. Replace the damaged component if the sealing surfaces are no longer smooth.

Step 4: Install the New O-Ring
Confirm the replacement matches the original specification. If the manufacturer permits lubrication, place only a thin film of approved O-ring-safe lubricant on the seal. Excess lubricant can collect dirt.
Press the O-ring evenly into its groove. It should sit flat all the way around without twisting, bulging, or crossing over itself. Do not stretch it more than necessary.
Step 5: Reconnect the Quick Connect
Wipe the male plug clean. Pull back the female coupler sleeve, insert the plug fully, and release the sleeve. Give the connection a gentle tug to confirm that the locking mechanism has engaged.
If the plug stops before it seats, do not force it. Recheck the O-ring position and verify that the male and female fittings are the same standard and size.
Step 6: Test the Repair at Low Pressure
Reconnect the water supply and follow the equipment manufacturer’s startup procedure. Begin with the lowest practical pressure or idle condition. Observe the connection from a safe distance.
If it remains dry, gradually return to normal operation while continuing to watch the joint. Shut the system down and depressurize it immediately if the O-ring pushes out, the coupler begins spraying, or the connection moves unexpectedly.

Why a New O-Ring May Still Leak
If the leak remains after replacement, one of these issues is more likely:
The O-Ring Is the Wrong Size or Material
A seal that is slightly too thin may not contact the plug. One that is too thick may be cut during insertion. Use the fitting maker’s specified replacement rather than a general plumbing assortment whenever possible.
The Plug and Coupler Do Not Match
Similar-looking fittings can have different dimensions or profiles. Confirm both the nominal size and the connection standard. Do not rely on outside appearance alone.
The Threaded Joint Is Leaking
Water at the threaded base can travel along the fitting and appear to come from the quick connect. Identify whether the joint uses tapered pipe threads, straight threads with a washer, or another sealing design, then follow the manufacturer’s assembly instructions. Adding thread tape to the plug will not repair an internal quick-connect seal.
The Coupler Is Worn or Damaged
A rough bore, weak sleeve, damaged locking balls, or cracked body calls for coupler replacement. Continuing to use a connection that will not lock securely can allow it to separate under pressure.
The Hose End Is Failing
Bulging, exposed reinforcement, movement at the crimp, or leakage from the crimped end means the high-pressure hose should be removed from service. If you need a replacement for a compatible residential setup, compare your requirements with the DECA 1/4-inch M22 Pressure Washer Hose, which supports M22-14 mm and M22-15 mm connections. Match every component to your equipment’s pressure, flow, temperature, and connector requirements.
How to Help New O-Rings Last Longer
- Wipe dirt from plugs before connecting them.
- Keep protective caps on stored fittings when available.
- Never connect or disconnect the coupler under pressure.
- Pull the sleeve back fully instead of forcing the plug past the seal.
- Use only compatible detergents and manufacturer-approved lubricants.
- Keep fittings off the ground, where grit can enter the coupler.
- Inspect O-rings whenever a connection begins to feel unusually tight or loose.
- Replace a damaged plug before it cuts the new seal.
If a repaired connection is dry but the system still loses pressure, follow DECA’s step-by-step pressure-loss troubleshooting guide to check the remaining water path.
Frequently Asked Questions
Can I use a plumbing O-ring in a pressure washer quick connect?
Only if its dimensions, material, pressure suitability, temperature range, and chemical compatibility match the fitting manufacturer’s requirements. A random plumbing O-ring may fit the groove but fail in service.
How often should I replace a quick-connect O-ring?
Replace it based on condition rather than a fixed calendar. Cuts, flattening, swelling, brittleness, repeated leakage, or difficulty connecting are signs that inspection and replacement are due.
Should I add thread-seal tape to stop the leak?
Thread sealant only applies to certain threaded joints. It does not seal the interface between a quick-connect plug and its internal O-ring. First identify the exact point where the water escapes.
Can I stack two O-rings for a tighter seal?
No, unless the fitting was designed for two seals. Stacking O-rings can prevent full engagement, damage the seals, and keep the locking mechanism from securing the plug.
Final Takeaway
A successful quick-connect repair starts with correct diagnosis. If water escapes between the plug and coupler and the sealing surfaces are undamaged, a properly specified O-ring may solve the problem. If the leak comes from threads, the coupler body, or the hose crimp, replace or repair the correct component instead of masking the symptom.
Work only on a fully depressurized system, keep every sealing surface clean, and verify the connection with a gentle tug before testing. Those few habits make accessory changes faster, safer, and far less likely to leak.


